Showing posts with label rehab. Show all posts

May 9, 2012

Vase rehab DIY: Blah to Yay!

I have often mention the joys of sprucing up some freebies:

*  Those oddball items you keep hanging onto but live in the depths of your closet or under your sink because you don't actually like them but feel bad about throwing them out because they're still useful.

* Thrift store or yard sale finds with potential

* Freecycle (freecycle.org) freebies

I have acquired a small collection of glass vases from Freecycle.  My husband's Urban Garden Paradise includes a wildflower cutting planter box, so in preparation for some fresh cut bouquets, I have been seeking out some containers.  I also have decided faux flowers are not necessarily relegated to the status of Mrs. Havisham, and can be done in style with punchy colors or romantically with vintage hues.  I've worked in both styles to various rooms:  vivid and playful daisies in the living room, and soft and romantic classics in the bedroom.

So my vase collection necessarily needs to grow from 1-2 to several.  But who wants to spend money on vases when they're so abundantly found second hand for free or cheap?  That's not to say I appreciate the style of those castoffs, so that's where a little creativity comes into play.  I've been itching to try some new techniques and rehab these either blah or dated vases, and here is my first endeavor.

Perfect for faux flowers, interior-painted vases can cover up internal ripples (as in my example) and leave plenty of room for a punchy embellishment on the exterior.  Check out the easy DIY below!

Witness my plain rippled glass freebie.  I'm not a fan of rippled glass vases.  I'm sure it's appropriate somewhere, but I don't care for it.  Plus with faux flowers, often the stems are not very attractive, so a translucent vase can subtract from the decorative effect.


(Right)
1.  Pour a water-resistant paint into the vase, such as latex paint or "patio" or outdoor acrylic.  I went with a Clark and Kensington Flat Enamel Paint and Primer in One in a Mediterranean teal that I got (for free!) from Ace Hardware.  It had wonderful coverage.

2. Gently roll the vase around until the paint has covered the full interior.  Then pour the excess back into the paint can.

3.  Let the vase sit upside down over some newsprint to drain the slower excess from the interior, for about an hour or so.  Don't let it sit so long the paint starts to dry and the newsprint peels off.  If this does happen, just scratch off the paper from the rim and touch up with some of the wet excess pooling on the newsprint.

4.  Turn back over right side up, and allow to dry, several hours or overnight.

5.  (left) Once dry, add your front embellishment with "puffy" paint or fabric paint (I used Tulip fabric paint in white).  If you make a mistake, or don't like it, just wipe clean with a damp paper towel, dry the vase, and start over.

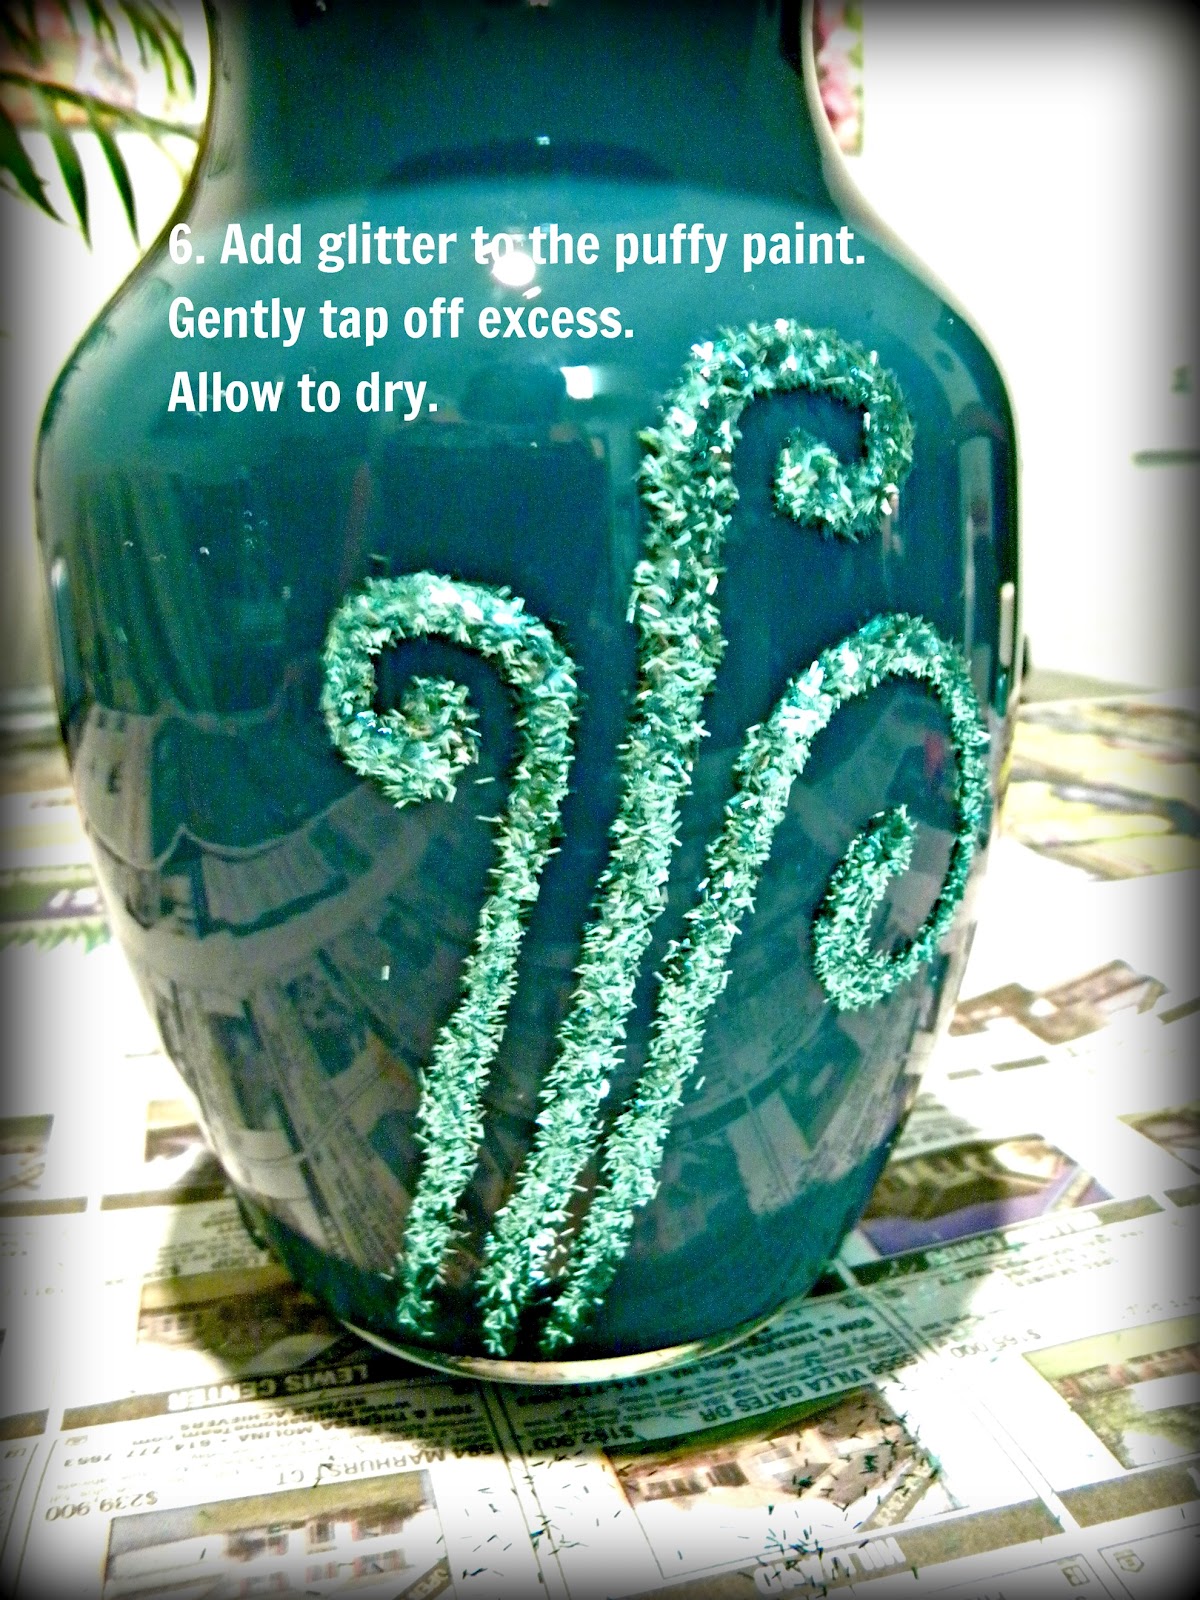
6.  Add glitter, gently tap off excess.

I started with this dot design in the puffy paint, but discovered it didn't work too well with the glitter I used.  I ended up sticking my fingers in it and disrupting several "dots" so I scrapped the whole design by wiping it off with a paper towel while it was still wet.  My simple three swirl lines (next photo) replaced it.

The glitter I used was the "tinsel" style which is little strands of flat strips of glitter instead of the regular tiny square pieces.  It has a nice, unexpected textural effect. (Martha Stewart tinsel glitter in Feldspar.)
Finally, add your flowers!  Faux flowers would work best at this stage, although you could spray the inside with a clear waterproof sealant if you wanted to be able to use fresh flowers.

Now you can see that the teal blends in with my decor!  I used a monochromatic palette but some other fun combos could be done with complementary colors such as a violet or plum interior and yellow or gold glittered exterior, or cobalt interior with orange or topaz glitter.  You could make your outer embellishment as simple or plain as desired.  Use your imagination!


January 19, 2012

Porcelain Canister Rehab: Freebie Find into Crafty Orgnaizers


I recently acquired a set of four porcelain canisters as part of a Freecycle run to score a kiddie papasan chair for Avi and a cool bulletin board with a crown-molding-style shelf for my office space.  The canisters were just part of the take: usually you have to pick up the whole lot o' giveaway stuff and sort out what you don't want later..that's just part of the exchange for getting the cool stuff!

But we already have a set of kitchen canisters (for flour, sugar, coffee, tea, and cookies).  These were actually part of a very large set of  pre-1970's USA-made Pfalzgraff stoneware in near perfect condition scored at a yard sale for $50, which we later looked up and valued on ReplaceIt.com for more than $800!! <-- just another reason to check out thrifty sources for stuff before running out and buying new!!  But I digress.

Unlike the Pfalzgraff set, however, these canisters looked really dated--in a large floral motif that looked like an old lady outfit.  So since they were free, I decided to see how easy (or hard) it would be to give them a facelift and bring them back into this decade.
Help me! I'm ugly!

Since they are porcelain and  stamped on the bottom, I did look them up online just to make sure they weren't secretly worth something.  They weren't.

Knowing they weren't valuable, and that they were FREE gave me the freedom to experiment, because at worst, if I totally screwed up, we weren't out anything.  That's a good position in which to find yourself!

So using just materials I had on hand, I set about to make these otherwise destined-for-Goodwill canisters into something useful for me.  It wasn't too hard though it did draw out over the course of a day because of the drying time in between coats, but the premise is simple.  Watch their transformation, and get ideas for that next thrifty find of yours!

Step One:  PRIME.  Since the porcelain glaze is shiny, the canisters needed primed with something in order to be re-painted.  I'm sure there are better substances one could have used to accomplish this, but since I only intended to use supplies I already had, I turned to a giant tub of economy Gesso (free from another Freecycle run!) and figured since you prime canvas with this gluey basic white paint, it couldn't hurt.  So I slapped a couple coats of Gesso on the canisters, letting them dry in between coats.

Step Two:  PAINT.  I consulted my drawer o' random bottles of acrylic craft paint, and chose, as best I could, four colors that looked good together.  I ended up going with bright jewel tones.  Once primer is dry, paint one coat, let dry, paint another coat, and so on.  It ended up taking THREE coats to fully cover up the flower print for the yellow and red, and TWO coats for the darker crocus and turquoise.

I used DecoArt's one-step crackle on top of the final layer of paint.  I must say I was pretty disappointed by the underwhelming crackle effect.  That might have just been the product of it being a one-step so there wasn't the second-coat in contrasting color to really pop the effect.  They do look mildly distressed up close, but no so you would notice from afar.  It did act as a sealant glaze though, so they went from matte to glossy, which I liked.

Step Three: DETAIL.  I wanted the canisters to have something special on them since the crackle turned out insufficient as a decorative effect.  I decided to use chalkboard paint so I could make re-usable "labels" on the front, to write the contents of the containers, which could be changed and re-labeled with ease.  I used masking tape to frame out a rectangle, and then painted it in with the chalkboard paint.  Do be sure the paint is 100% dry or you will peel it off when you remove the tape.  As it was, I did end up chipping some of the crackled pieces off whilst removing the tape, which I just touched up with a small brush.


It is recommended to use at least two coats of the chalkboard paint, allowing to dry in between coats.  Then once dry, being VERY careful to remove the tape, I pulled it off, touched up any little chips, and let dry again.

Then I used regular black paint to make some additional details, to make the design pop a bit, and help reduce any still-evident shadows of the darkest            
                                                                                    flowers underneath.

The finished set, ready to conceal all my little craft orphans!