Showing posts with label frugal living.. Show all posts

May 9, 2012

Vase rehab DIY: Blah to Yay!

I have often mention the joys of sprucing up some freebies:

*  Those oddball items you keep hanging onto but live in the depths of your closet or under your sink because you don't actually like them but feel bad about throwing them out because they're still useful.

* Thrift store or yard sale finds with potential

* Freecycle (freecycle.org) freebies

I have acquired a small collection of glass vases from Freecycle.  My husband's Urban Garden Paradise includes a wildflower cutting planter box, so in preparation for some fresh cut bouquets, I have been seeking out some containers.  I also have decided faux flowers are not necessarily relegated to the status of Mrs. Havisham, and can be done in style with punchy colors or romantically with vintage hues.  I've worked in both styles to various rooms:  vivid and playful daisies in the living room, and soft and romantic classics in the bedroom.

So my vase collection necessarily needs to grow from 1-2 to several.  But who wants to spend money on vases when they're so abundantly found second hand for free or cheap?  That's not to say I appreciate the style of those castoffs, so that's where a little creativity comes into play.  I've been itching to try some new techniques and rehab these either blah or dated vases, and here is my first endeavor.

Perfect for faux flowers, interior-painted vases can cover up internal ripples (as in my example) and leave plenty of room for a punchy embellishment on the exterior.  Check out the easy DIY below!

Witness my plain rippled glass freebie.  I'm not a fan of rippled glass vases.  I'm sure it's appropriate somewhere, but I don't care for it.  Plus with faux flowers, often the stems are not very attractive, so a translucent vase can subtract from the decorative effect.


(Right)
1.  Pour a water-resistant paint into the vase, such as latex paint or "patio" or outdoor acrylic.  I went with a Clark and Kensington Flat Enamel Paint and Primer in One in a Mediterranean teal that I got (for free!) from Ace Hardware.  It had wonderful coverage.

2. Gently roll the vase around until the paint has covered the full interior.  Then pour the excess back into the paint can.

3.  Let the vase sit upside down over some newsprint to drain the slower excess from the interior, for about an hour or so.  Don't let it sit so long the paint starts to dry and the newsprint peels off.  If this does happen, just scratch off the paper from the rim and touch up with some of the wet excess pooling on the newsprint.

4.  Turn back over right side up, and allow to dry, several hours or overnight.

5.  (left) Once dry, add your front embellishment with "puffy" paint or fabric paint (I used Tulip fabric paint in white).  If you make a mistake, or don't like it, just wipe clean with a damp paper towel, dry the vase, and start over.

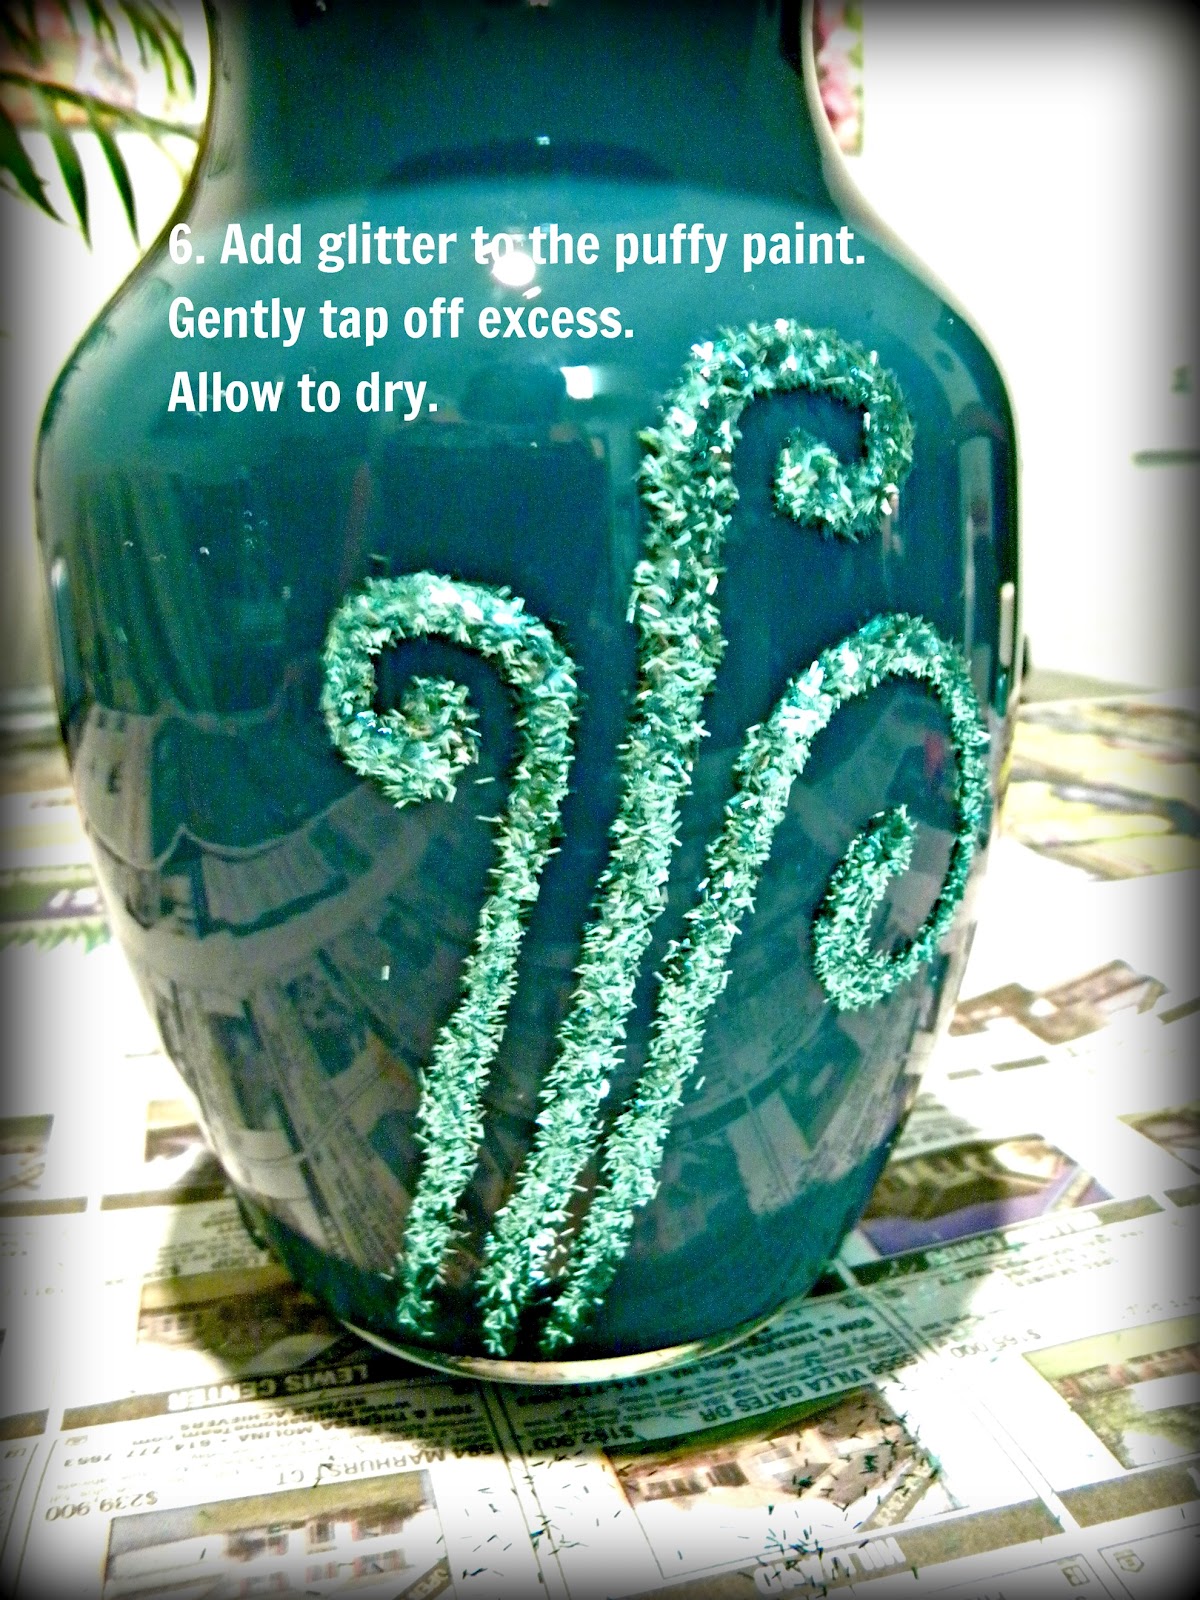
6.  Add glitter, gently tap off excess.

I started with this dot design in the puffy paint, but discovered it didn't work too well with the glitter I used.  I ended up sticking my fingers in it and disrupting several "dots" so I scrapped the whole design by wiping it off with a paper towel while it was still wet.  My simple three swirl lines (next photo) replaced it.

The glitter I used was the "tinsel" style which is little strands of flat strips of glitter instead of the regular tiny square pieces.  It has a nice, unexpected textural effect. (Martha Stewart tinsel glitter in Feldspar.)
Finally, add your flowers!  Faux flowers would work best at this stage, although you could spray the inside with a clear waterproof sealant if you wanted to be able to use fresh flowers.

Now you can see that the teal blends in with my decor!  I used a monochromatic palette but some other fun combos could be done with complementary colors such as a violet or plum interior and yellow or gold glittered exterior, or cobalt interior with orange or topaz glitter.  You could make your outer embellishment as simple or plain as desired.  Use your imagination!


January 23, 2012

Make your own flavored coffee creamer: Control the fat, sugar, and taste!!

Think flavored coffee creamer is ____________ ?
a. Stupid expensive
b. ungodly sweet
c. full o'fat and sugar (and by sugar I mean high fructose corn syrup)
d. full of random other ingredients like artificial flavors and preservatives, and other strange things
e. ALL of the above

ME TOO!

Good thing there's an alternative... you can Make It Yourself!!  << you may be seeing a pattern in my posts, snicker>>

Yes folks, the little luxury of having pre-mixed flavored coffee syrup can be yours with 5 minutes of prep or less a week, and you have control over the FAT content, SUGAR content, and FLAVOR. You can make it with things you probably have on hand!  Whoo hoo!

Today I was playing around with different proportions of these ingredients and I found what puts me in coffee bliss (I just got a like-new condition Senseo one- or two-cup coffee maker AND two bags of unopened pods...  for FREE, thanks to Freecycle! So I've been endlessly playing with cups of coffee).

By making variations to this recipe to suit your taste (it is do it yourself, after all) you can customize your own flavored creamer for that perfect coffee treat!

Before I begin.. let me just point out some stats for the commercial stuff:

Prices (via Google Shopping query)-
Nestle Coffee-Mate in french vanilla, $4-5.07 for 15 oz
Good Kind Natural Coffee Creamer, French Vanilla, $7.20 for 8oz
International Delight, French Vanilla, $3-4.50 for 13 mL

Ingredients for Nestle Coffee-Mate French Vanilla creamer 
(copied directly from their site HERE): 

WATER, SUGAR, HYDROGENATED COCONUT OIL, SODIUM CASEINATE (A MILK DERIVATIVE), FLAVOUR AND ARTIFICIAL FLAVOUR, DIPOTASSIUM PHOSPHATE, SALT, MONOGLYCERIDES, ACETYLATED TARTARIC ACID ESTERS OF MONO- AND DIGLYCERIDES.


Now to make your OWN you can use:

Heavy Whipping Cream (choose your fat version, organic, lactose-free, whatever)
Milk (choose your own milk alternatives, organic, lactose-free, fat percentage, etc.)
Sweetener (sugar, Stevia, I abhor non-natural artificial sweeteners, but if you like them- it's your body, agave                       syrup, etc.)
Flavor (I definitely recommend pure extracts, you can choose vanilla or whatever else you like, or mix and match, like vanilla & cinnamon, butter & rum, etc)

To make:

I recommend using a glass container with a lid for storage and ease of shaking up: recycle an empty glass jar, such as from pasta sauce or "canned" fruit or veggies, etc.!

To this container, add UP TO equal proportions heavy whipping cream and milk OR reduce the ratio of cream to milk to lower the fat content.  Obviously the less cream to milk, the less "creamery" it will taste. Shoot for one-cup total, or whatever you will consume in one week for best quality.

I recommend starting at 1:3 cream to milk and go up from there to taste.  I don't recommend more cream than half and half, because the fat in the cream will float slightly on your coffee--you'll see little "oil slicks."

Taste, Taste, Taste!  You can always add more of something!  Keep tasting, adding a bit at a time, because what I think is yummy, you might not.

When you've arrived at your ratio of choice for cream and milk, add your flavor extract(s).  For one cup of cream-milk mixture, start with 1/2 teaspoon of extract, shake well, taste, and go from there.

Next add your sweetener.  If you are adding a sweetener in crystal form (as opposed to liquid) it would be best to dissolve it in a little bit of warm water first.  The benefit of doing this is that you get an accurate picture of the sweetness, whereas the sugar crystals may not dissolve right away in the cold milk-cream mixture and you might keep adding more and more because you can't taste it right away, then end up going EW! Too Sweet!  later.

For one cup of the milk-cream mixture I started with one tablespoon and ended up going to about two and a half. Remember you're not going to be drinking this straight, but very diluted in coffee so think about how much you end up sweeting your coffee... if you use a whole spoonful of sugar in one cup of coffee you're going to want your stir-in much sweeter, whereas I normally add NO sugar to plain coffee, I just like my flavored creamer to have a *hint* of sweetness.

So there you go!  Have fun experimenting (and saving money, and avoiding yucky additives!) Remember to keep refrigerated and shake well before use!


Image credits (Featuring some of my fave brands!):  Heavy whipping cream, Kemps brand;  Organic low fat milk, Organic Valley Co-op Brand; Vanilla extract, J.R. Watkins Brand; Stevia, Stevia Extract in the Raw Brand.