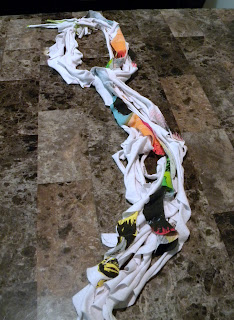
These frilly accessory scarves are popping up all over, and they're super easy and unthinkably cheap to make one for yourself. It's a great way to score a fashionable piece by recycling an unloved jersey T-shirt--either your own or you can nab one from a thrift store for less than a couple bucks. It takes about 30 minutes of your time or less (it took me a half an hour, even with pausing to take photos for the tutorial, though I was using a thin piece of tee).
Materials:
1. standard jersey knit tee, sizes XL or larger work best for a fuller scarf, or use a couple mediums (even in different colors if you like). You can plain white tees and dye them any shade you like, or just use a tee in the color you want for your scarf.
2. Circular object to trace, such as a plate. Smaller circles will give you more narrow frills, while larger circles will give deeper frills.
3. Washable marker or fabric pencil to trace circles onto fabric.
4. Scissors
That's it! Ready? You won't believe how simple this is. The best part, no perfection is needed for any step and no sewing either--jersey doesn't fray and when you pull it taught the unfinished edges roll so you won't even see any imperfections from the cutting!
Instructions:
1. Lay your tee out flat. I used a sleeveless PJ tank. Cut up a side seam so you have a long strip of fabric. If you have sleeves, you can cut those off.
2. With your fabric laid flat, use your plate and marker to trace as many circles as will fit on your tee. I folded the cloth in half so for each circle I traced and cut, I got two, halving my cut time.
3. It's best to end up with an even number, but cut as many as possible, just in case you mess one up. Then collect your circles and set aside your scraps (but don't discard yet, you'll need a piece later). Since my tee was mostly white with a bit of graphic, the scarf is mostly white with a little pop of color. Below--my cut circles. I got 12 circles of about 7" diameter.
4. Cut each circle into a spiral. You can dot the back for a guide, but it's perfectly easy enough to freehand your spiral since it doesn't need to be perfect anyway. The photo is just a guide, and the only one I drew out a spiral. Once you get the hang of it, stack some circles and do them all at once to save time. With the super-thin weight of this tee, I cut 4 at a time. I cut the spiral about 2 inches wide. Wider and you will have deeper ruffles. Thinner, and you have tighter frills. Your choice. I think I like the wider ones better, but since I was just using small circles and lightweight material, the thin ones were more appropriate.
5. Once you have your spirals, with one end in one hand, gently stretch the strip straight by running your other hand down the entire strip and letting it bounce back a couple times. You'll see it ruffle and the ends roll. It should also lengthen considerably. Don't over-stretch though or you'll decrease the bounce of your ruffles.
6. Next, gather all your strips neatly in one hand with all the pointy tails (the part of the spiral that was outer-most) together. Count them, and separate them into two even groups. If you have an oddball, pull it out. Then "mate" each tail in one group to another and double-knot it with a simple knot.
7. Take a piece of scrap tee, wrap the bundle of knots and tie this to give it a more finished look.
8. Your scarf is pretty much done. You can add things to it (like a flower pin, buttons, or any other little embellishments) or leave it as it is. Tie it in a knot or two in front of you and let the frilly ruffles dangle. It's machine washable, so if you can see any of your marker tracings you can wash these out, or dye the scarf if you wish.
Stack it with a tee and a jacket or whatever you like!


No comments:
Post a Comment