

* Those oddball items you keep hanging onto but live in the depths of your closet or under your sink because you don't actually like them but feel bad about throwing them out because they're still useful.
* Thrift store or yard sale finds with potential
* Freecycle (freecycle.org) freebies
I have acquired a small collection of glass vases from Freecycle. My husband's Urban Garden Paradise includes a wildflower cutting planter box, so in preparation for some fresh cut bouquets, I have been seeking out some containers. I also have decided faux flowers are not necessarily relegated to the status of Mrs. Havisham, and can be done in style with punchy colors or romantically with vintage hues. I've worked in both styles to various rooms: vivid and playful daisies in the living room, and soft and romantic classics in the bedroom.
So my vase collection necessarily needs to grow from 1-2 to several. But who wants to spend money on vases when they're so abundantly found second hand for free or cheap? That's not to say I appreciate the style of those castoffs, so that's where a little creativity comes into play. I've been itching to try some new techniques and rehab these either blah or dated vases, and here is my first endeavor.
Perfect for faux flowers, interior-painted vases can cover up internal ripples (as in my example) and leave plenty of room for a punchy embellishment on the exterior. Check out the easy DIY below!


(Right)
1. Pour a water-resistant paint into the vase, such as latex paint or "patio" or outdoor acrylic. I went with a Clark and Kensington Flat Enamel Paint and Primer in One in a Mediterranean teal that I got (for free!) from Ace Hardware. It had wonderful coverage.
2. Gently roll the vase around until the paint has covered the full interior. Then pour the excess back into the paint can.
3. Let the vase sit upside down over some newsprint to drain the slower excess from the interior, for about an hour or so. Don't let it sit so long the paint starts to dry and the newsprint peels off. If this does happen, just scratch off the paper from the rim and touch up with some of the wet excess pooling on the newsprint.
4. Turn back over right side up, and allow to dry, several hours or overnight.

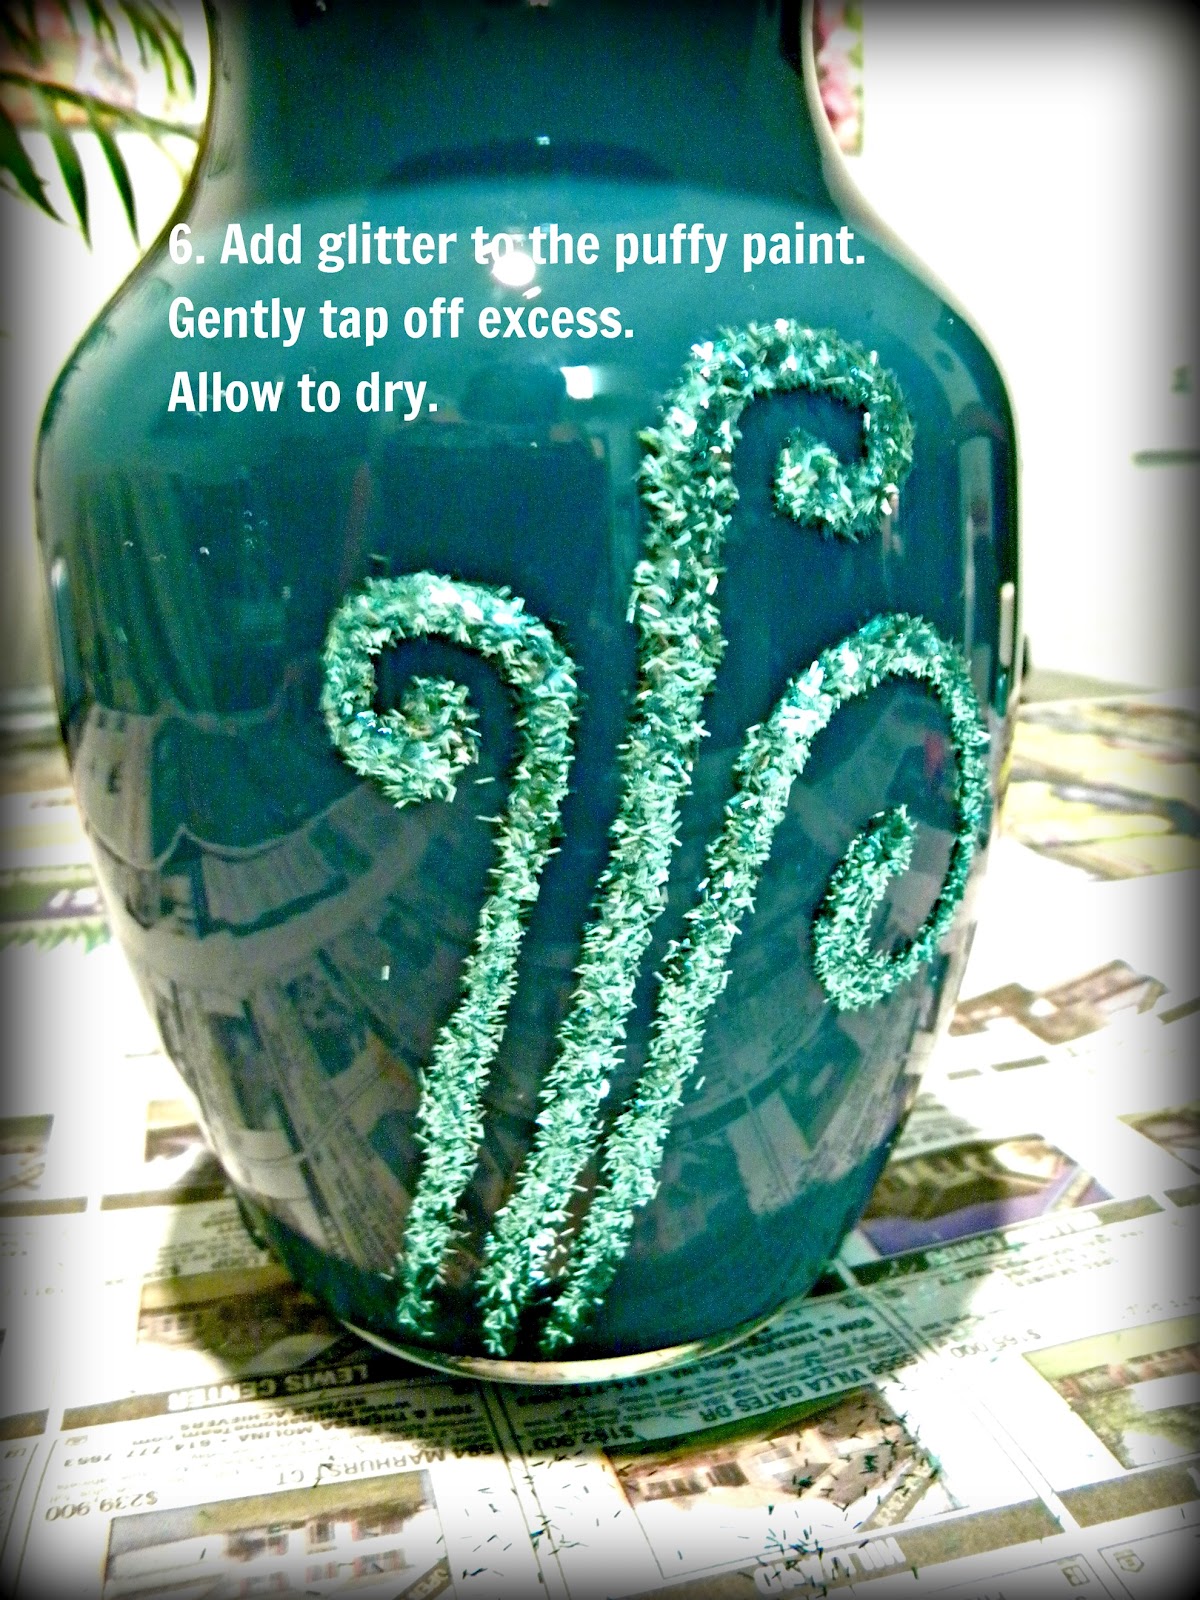
6. Add glitter, gently tap off excess.
I started with this dot design in the puffy paint, but discovered it didn't work too well with the glitter I used. I ended up sticking my fingers in it and disrupting several "dots" so I scrapped the whole design by wiping it off with a paper towel while it was still wet. My simple three swirl lines (next photo) replaced it.
The glitter I used was the "tinsel" style which is little strands of flat strips of glitter instead of the regular tiny square pieces. It has a nice, unexpected textural effect. (Martha Stewart tinsel glitter in Feldspar.)
Finally, add your flowers! Faux flowers would work best at this stage, although you could spray the inside with a clear waterproof sealant if you wanted to be able to use fresh flowers.
Now you can see that the teal blends in with my decor! I used a monochromatic palette but some other fun combos could be done with complementary colors such as a violet or plum interior and yellow or gold glittered exterior, or cobalt interior with orange or topaz glitter. You could make your outer embellishment as simple or plain as desired. Use your imagination!

No comments:
Post a Comment